Pumpkins with Personality!
For those who'd prefer a less messy pumpkin decorating activity, have a look at how to prettify your pumpkins! Stylist Fi shares her top tips on creating bespoke designs this Halloween.
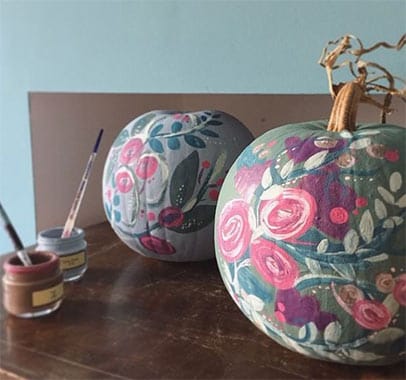
If you’re anything like me, you’ll find carving pumpkins more than a little bit faffy. This year I wanted to create some pretty pumpkins, inspired by the lovely Little Folks wall murals of this summer.
Read on for a step by step guide on how to prettify your pumpkins!
Select your pumpkins. - The rounder and more evenly shaped, the better Select a palette of paint colours. For my pumpkin painting, I used samples from The Little Greene Paint Company as I just love their suite of colours. Interior emulsion works really well, and for a chalky finish, choose matt.
Decide on your base colour. I chose a soft blue-grey and a stronger teal for my pumpkins as I wanted them to sit well together.
Prepare your pumpkins. - Ensure that they are clean with any mud removed before beginning to paint!
Paint the background colour. - Ensure you use scrap paper underneath the pumpkin as it’s a little tricky to paint underneath.
Time to add some personality! I drew a few floral designs first on some paper to practise the surface pattern. This is a good thing to do, because painting on a round object is much more difficult than painting on flat paper.
Try not to worry about the end result - Just let you creative juices flow. If you have really little ones, why not try sticking objects onto the pumpkin instead. - Things like feathers, gems and leaves work really well.
We’d love to see some pictures of your pumpkins with personality, so if you make some, send us a snap!
Happy Styling!
Fi x